The Chemistry of Catnip

When you put catnip in a toy for your cats, or if you place some on the floor, or if you keep a fresh catnip plant near the window, your cats are going to go nuts for it. Your cats may exhibit several behaviors that are similar to how female cats react when they’re in heat. Your cats may sniff at it for a few minutes, rub their cheeks against corners, groom themselves, roll their bodies over it, or eat it. Not all cats respond to catnip the same way. Some will back away from it, and some cats appear unaffected by it. So let’s look at some facts about how catnip does (or doesn’t) affect our cats.

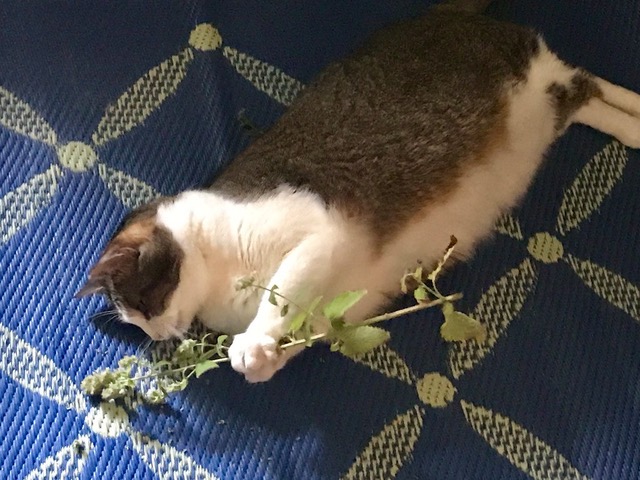
This little lady is loving a whole stem of catnip!

The History and Science

Originally called Nepeta Cataria, catnip is a perennial herb from the mint family. It is also related to other herbs like oregano, basil, and spearmint. The plant is indigenous to Europe and its effect on cats have been known and recorded since the 1700s. Due to it’s popularity, it now grows all over North America. Although it is widely known as a weed, there are roughly 250 species in the plant family that are popular in herb gardens. The oil Nepetalactone is an active ingredient that is found in the leaves of catnip. Humans can’t smell this oil, but it has a special scent to domestic cats and even to wild cats such as leopards, lions, and tigers. The plant also has other ingredients such as tannins, acids, and sterols which cause cats to get high from the oil Nepetalactone. This oil binds receptors inside a cat’s nose and this stimulates sensory neurons leading into cat’s brain. Thankfully, it isn’t addictive and it is completely harmless to cats. Nepetalactone is a stimulant, and when your cat sniffs catnip leaves or dried catnip, your cat gets high in a way that is similar to when humans take drugs. This effect usually lasts for about ten minutes. The plant also acts as a sedative as its initial effects wear off.

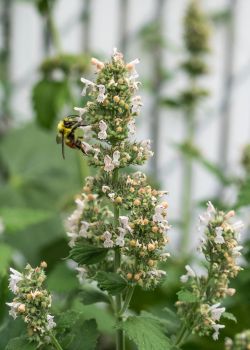
A bee feeding on a catnip plant.

The Catnip Response is Hereditary

What determines whether a cat will react to catnip is a genome which is inherited, or not inherited, at birth. When a kitten is three to four months of age (when they have become sexually mature) you will discover whether or not they react to catnip.

Cat’s Reaction to Catnip Can Dull Over Time

As a cat ages, their reaction to catnip can change, which means they might have a very subtle reaction to catnip, or no reaction at all. Your cat’s reaction (or lack thereof) can also be caused by being exposed to catnip too often, therefore triggering the loss of your cat’s ability to sense it. It’s recommended that you only give your cat catnip as a treat up to once a week. This means that you probably shouldn’t leave toys filled with catnip hanging around the house where your cats will have constant access.

Loving his catnip filled birdie!

Too Much For Males

When male cats are exposed to catnip, some become a bit too frisky and can even become aggressive with their owner or with other cats. This can create a pretty dramatic scene if you have multiple cats in your home and one happens to take on the persona of The Hulk. Keep in mind that this doesn’t always happen. Some cats drool, others become very playful, some get frisky, some get aggressive, others become extremely vocal, and some will just enjoy their experience. If you plan on give catnip to multiple cats, give it to them individually in separate rooms to avoid any issues.

You Can Use Catnip to Condition Behavior

Have you ever heard of positive and negative reinforcement? If not, don’t worry about it (unless you work in the health and social services fields). Psychologists determined that negative reinforcement towards children and pets such as spanking, yelling, using terms like, “You’re being bad” is more damaging to the behavioral health of pets and children. It is better to offer to your children and pets positive reinforcements, and this is done by praising good behavior by giving gifts or treats. If you have an aggressive cat in your multiple cat home, you can modify their behavior by providing them with catnip as a means of calming them. If you have a cat that is fearful, timid, or has experienced trauma, you can treat them with catnip as well. This can also be used to enforce personal playtime between you and your cat.

“This is the best prize ever!”

How to Grow Catnip

The common name for the the plant is “catmint” and it can be grown easily and in potted plants or a backyard. The plant can become up to three feet tall and three feet wide. Their rather small, white colored flowers grow in clusters on the plants and the stems have a squarish shape which naturally belong to the mint family. The plant needs sun and they are very drought-tolerant so if you live in the desert you can grow these plants without struggling. To start growing catnip, plant them in partial shade to and make sure to use alkaline soil in your potting plant or garden. If you are growing catnip in your home, try to keep it in a hanging basket from a ceiling hook so your cats can’t access it. If you’re growing the catnip in your garden, fence off this area of your garden so wild cats won’t be tempted to come and raid your garden. It is recommended that you pinch the stems of the plant while it’s growing to loosen the plant stem. When you begin harvesting, the plant must be flowering and dry. Cut off the whole plant at the base and hang it upside down in a dark, dry, well-ventilated place such as a pantry or an attic. Afterwards, store the dried leaves, stems, and flowers in a freezer bag to preserve the potency of the oil within the plant.

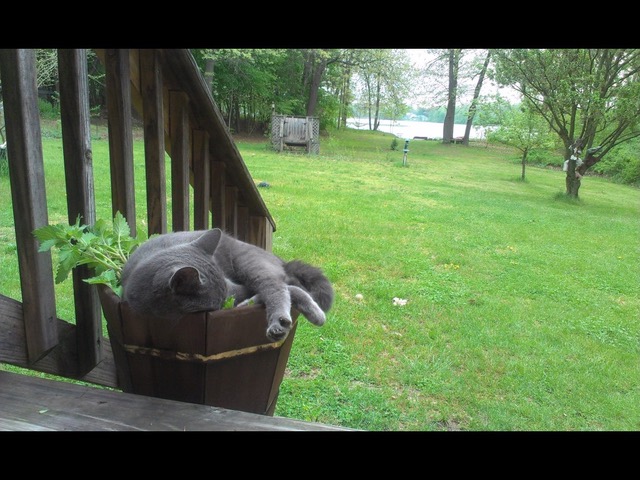
This kitty found the catnip plant outside!

Catnip for Humans

Catnip can be brewed to produce an herbal tea for human consumption. It is also used as a culinary herb for some dishes. It can be smoked, and it only has the effect of relaxation like other herbal cigarettes (otherwise known as tobacco-free cigarettes) such as corn silk, lemongrass, mint, cinnamon, and rose petals.

Don’t Want To Grow Catnip? Try Catnip Spray!

If you don’t want to deal with growing your own catnip plants, you can always purchase it at your local pet store, or purchase catnip spray. Catnip spray is made with concentrated catnip oil. The oil is steam-distilled from the catnip plant to produce very potent catnip oil. You can spray it on your cat’s toys, scratchers, cat condos, or their cat tree. KONG and Field Organic Catnip Spray are two of the best brands around.

Regardless for the reasons why you decided to use catnip or where you get it from, your cats will surely love you for it. Whether you give catnip toys to your new kitten, keep a small plant in your kitchen window, or provide your elderly cat with catnip to keep them comfortable, they will be very excited. Enjoy watching your cat roll around in bliss, and maybe can enjoy some catnip tea with them!

Elanda-Isabella Atencio, our Feline Editor, is on her road to being a “crazy” cat lady. She has three cats; a moody Missus, a wild Baby Kitty, and notorious Fredrick Douglass. She was raised with cats, chickens, dogs, and geese. From cleaning coops, morning dog runs, picking eggs, to growing catnip, Elanda enjoys pampering her pets. Elanda is a student at New Mexico State University, earning her BA in Creative Writing and is Editor-in-Chief of the online arts journal, Independent Noise and reader for Puerto del Sol. She plans to move to Oregon, where she hopes to take her cats on daily walks when it’s overcast and cool. If you’d like to contact Elanda, email her at eincatencio@gmail.com.

How to Protect Your Dog From Fleas

Flea infestation is one of the most dreaded problems that dog owners face, yet many owners don’t know how to spot or treat them. This can be an issue for your pet – enduring fleas for any amount of time is an extremely itchy and uncomfortable experience. Luckily for you, there are several steps that you can take to prevent your dog from ever getting fleas and to get rid of them quickly should your furry friend ever suffer from this issue.

Ticks and fleas must be avoided at all costs!


How Do I Know If My Dog Has Fleas?

Has your pup been biting at themselves and scratching a lot lately? One of the best ways to determine if this is caused by fleas is to see if there is any ‘flea dirt’ in your dog’s fur. Flea dirt is actually flea feces. It consists of blood consumed by the flea and their other wastes. If your dog has lightly colored fur, this will be easy to spot, however, if your dog has darker fur, you can use this simple test to determine if they have fleas:

  1. Using a fine tooth comb, brush through your dog’s fur and check for small black specs.
  2. If you see these specs, place them on a damp piece of tissue and wait to see if they turn red.
  3. If they do, you’ve found flea dirt and have confirmed that your dog has fleas.
  4. If not, it could just be regular dirt. This doesn’t mean that you’ve ruled out the presence of fleas since there isn’t a build up of flea dirt available when your dog first becomes infected. Additionally, your dog can remove evidence of flea dirt if they bite, lick, and scratch themselves excessively. However, it can also be a good sign. If your dog does have fleas, you’ve managed to catch the problem early on and can fix the issue before it progresses too far.

Fleas and ticks love hiding inside dog’s ears!

How Can I Be Sure That it Isn’t Something Else?

If you haven’t found flea dirt in your dog’s fur and are uncertain that it’s actually fleas that are giving your dog itchy discomfort, there are a few things you can look at to either confirm or disprove your theory.

Ticks

Tick bites can be just as uncomfortable for your pet, but the type of bite they leave behind is different than a flea bite. Both tick bites and flea bites appear to be small red lesions, however there are some subtle differences.Tick bites tend to be bigger than flea bites (though exceptions can be made for seed ticks) and are more likely to take on a bull’s eye shape. Tick bites are also more likely to scab over, though the same can also be said for flea bites if your pup has been scratching and biting the affected area excessively.

Mosquitoes  

Mosquito bites are more likely to look like a flea bite and can be every bit as itchy. However, the difference can be determined by looking at the patterns of the bites. Does it look like there are only a handful of bites on your dog, all of which are spread out from each other? You’re likely dealing with a mosquito bite. However, if the bites seem to be clustered together in the same area you’ve most likely got a flea issue on your hands.

Mosquitoes like humans and animals alike.

My Dog Has Fleas. What Do I Do?

Have you found flea dirt in your dog’s fur or otherwise confirmed the presence of fleas? This is unfortunate, but luckily there are several great ways to tackle this issue.

Flea Shampoos

One of the best ways to combat fleas is to use medicated shampoo. This method proves very effective in fighting fleas, and it is also safe for your pet. Simply find a brand that works well for you and draw a bath for your pet! These treatments last for up to 2 weeks at time and will significantly reduce your dog’s discomfort.

Many people seem to think that using a medicated shampoo will leave a strong or unpleasant smell on their dogs coat. This may have been true at one point in time, but thanks to recent advancements in products it is no longer the case. If you do a bit of investigating, you’ll easily find the best smelling dog shampoo on the market – perhaps even a brand that you like better than your dog’s regular shampoo.

Do keep in mind that, in order for this option to work, your dog will have to be patient. The majority of shampoos designed to treat this problem require your dog to let the shampoo sit in their fur for a minimum of 10 minutes before you can wash it out.

Sometimes problem-solving can be as simple as a bath.

Oral Medications

If you don’t want to rely on shampoo to fix the problem or don’t think your dog will be patient enough to use this option, you can try using oral medications. Some oral medications begin to work as quickly as 30 minutes after consumption and effectively kill up to 99% of fleas.

Spot On Treatments

Spot on treatments are likely the most thought of solution when it comes to getting rid of fleas, but this doesn’t mean that they are the most effective solution. These treatments will only work in the areas that the treatment is applied to. Additionally, some of these treatment options only work for developed fleas or for the larva fleas – not both. Be sure to do ample research into what your dog needs before choosing this option.

Classic flea and tick prevention like Frontline Plus!

Consult Your Local Vet

Have you tried these options without seeing any success? It may be time to talk to your local veterinarian. Your local veterinarian will have seen dozens – if not hundreds – of similar cases and will likely be able to prescribe medication to your pup that isn’t available over the counter. They’ll also be able to give you tips and tricks to use to make your home a less friendly environment to fleas.

Conclusion

That’s it! You should be well on your way to addressing the problem and finding a solution that works well for you and your dog. Be sure to check for fleas consistently after you’ve treated them the first time – you don’t want a problem like this to resurface and become an issue again.

Remember, Your Pet Space requires that a flea and tick preventative must be used for all boarded and daycare dogs so that bugs don’t spread. Let us know what you’re using to keep the bugs away!

Emma is the founder of HelloCutePup. As the owner of 3 dogs, Emma has had the pleasure of learning the ins and outs to becoming a pet owner. With years of experience working on training, at-home dog health care, and aesthetic maintenance, she has the real-world experience that every pet owner is looking for. She is an avid blogger who enjoys giving realistic tips and tricks to help dog owners understand their pet’s personalities and to help pets easily become a part of the family.

Steps to Take When You Find a Lost Pet

We’ve all seen lost pets running along the sidewalk, down the street, or through our neighborhoods and wished we could help. Some of us may have even risked our own safety to try to save the life of a lost pet, with mixed results. For me, it is extremely difficult, nearly impossible, to see a dog running down the street without pulling over and trying to help. Since this is “Back to School” month (BARK to School, as we call it at Your Pet Space), I am going to teach you what you should do when you find a lost pet to keep the animal safe, and to keep yourself safe.

This poor thing deserves a real place to call “home”.

The first thing that you should know is that sometimes these animals know exactly where they’re going. Sometimes dogs, and especially cats, get out of their homes or they are even let out to roam the town by themselves. While this is greatly frowned upon, some owners still participate in this very dangerous practice. If you see a dog or cat walking down the sidewalk looking like they know exactly where they’re going, they probably do. This means that, if you pick up these dogs and take them off of their route, THEN they’ll be lost and their owners may not think of looking in the shelter because they’re used to their dogs being out on their own. This doesn’t mean that it’s okay, but if a dog or cat seems like they know where they’re going, you may want to think twice about picking them up. No animal is truly “safe” while wandering the streets, even if they know where they’re going.

This being said, if you decide you want to try to get this dog or cat off the street, there are a few procedures you should follow to keep yourself, the animal, and the drivers on the road safe. First of all, be careful not to slam on your brakes if you are driving. If you see an animal, pull over to a safe area before getting out of the car. If your car is in the way of other drivers, that can be a huge safety concern to everyone involved.

Chasing dogs down the street isn’t the best way to save them. Try luring them to you with treats and a “puppy voice”.

If you determine that you are in a safe area and the dog appears safe to approach, there are some items that you should try to have on hand. You should carry some good-smelling treats in your car to convince the dog to come closer. A variety of treats would be good in case they aren’t impressed by your first choice. Treats like dried liver, salmon treats, and jerky are some of the best smelling to dogs. Next, you should have a leash. Because many loose dogs don’t have collars, you should get a slip lead. This allows you to keep some distance from the dog, it gives you control, and it won’t matter if the dog doesn’t have a collar. You can turn a regular leash into a slip lead by feeding the end with the clip through the handle. This will create a loop in the leash that you can slip over the dog’s head. You will be holding the end with the clip as the handle with this method.

If you cannot get the dog on the leash or if it becomes frightened and runs into traffic, signal approaching vehicles to slow down. If the animal is in the road and appears to be injured, attempt to divert traffic around them. DO NOT PUT YOURSELF IN HARM’S WAY. Even though you’re trying to protect and save a lost animal, protecting yourself needs to be the priority. Do what you can to save the animal, but if the situation becomes too dangerous or if it becomes too much for you to handle, there is no shame in taking a step back. Inform local animal control agencies and keep an eye on the animal if possible while waiting for them to arrive. Anything you do to help save an animal is a gift, no matter how small it may be.

Once you get them on the leash, lure them into the car with treats. Avoid lifting the dog or letting them near your face as they may be more nervous than they seem and they may try to snap at you. They may also have parasites or diseases that you are unaware of that can rub off on your skin or clothes. When you get them in the car, you may want to restrain them by placing them in the back of the car where they cannot reach you, or by placing them in a crate if you have one handy. An energetic, nervous dog could cause some very dangerous driving conditions. In some cases, it is smarter to stay where you are with the dog in your car so you don’t have to risk driving. In this case, you would have to call the local animal control agency to pick up the dog, or call a friend or family member for back-up if you aren’t willing to turn them over to the shelter yet.

This poor baby needs a bath and some love.

If you don’t feel comfortable taking the dog to the shelter right away, you have a few options. If you want to take the dog home until you find the owner, make sure to keep it separated from all of your other animals until they go to the vet. You have no way of knowing what diseases or parasites this stray dog might be carrying. Always check them for an ID and get them scanned for a microchip as soon as possible. In New Mexico, it is required by law that every dog gets microchipped, but some people do not choose to follow this law. You can get them scanned for a microchip at any vet clinic or at the shelter. I would recommend taking them to the vet as soon as you can because then you can have them looked at, as well. Be warned though, you will probably have to cover the vet bills, especially if you cannot locate the owner. Vet bills are a small price to pay when saving the life of an animal.

“Will you help me find my family?”

Once you have determined that the dog doesn’t have a licence or microchip or if the information is out of date, you may take them home and begin making “found pet” fliers. Make sure to contact all of your local shelters and vet offices to let them know about the dog and to file a found dog report. Post fliers in the area where you found them, and share pictures of them and their story online. DogCruces is a great resource for local lost and found pet reports. They are shared widely, and many owners are able to locate their animals through DogCruces. I would recommend that you hold onto the dog for as long as you are able. Shelters are a great place for owners to find their pets, but you can also file a found pet report through them. If they are at the shelter, they only have three days before being listed as “adoptable”. After this, they only have a few more days before facing the risk of euthanasia. By holding onto them as long as possible (and continuing to look for their owner) you are giving them a few more days of life.

The Humane Society of the United States explains that, “In almost every state, the animal is not ‘owned’ by the finder until the holding period for strays (as specified by state or local laws) has expired and the finder has made an attempt to reunite the animal with their original owner and…has taken steps—obtaining vaccinations, license, collar and identification tag—to prove they are now the owner.” In New Mexico, the holding period for strays is three days. This means that they must be in the shelter or you must actively be looking for the owner for three full days before you can decide to keep the dog or before they will be placed for adoption through the shelter.

Clean, fed, leashed, and loved.

To keep your dog safe, show them you love them by getting them spayed or neutered, getting them fully vaccinated, have them microchipped, make them an ID tag with their name and your phone number, keep them on a leash when you go out, make sure they can stay safely inside your house and yard, and give them all of the love that they can handle. Dogs are angels covered in fur, so treat them the best way you can possibly imagine. They deserve that and more.

Jessica Smith, Managing Editor, having been raised in a household full of dogs, guinea pigs, hamsters, and all things furry, Jessica’s love of animals has only grown over the years. She is currently volunteering for Safe Haven Animal Sanctuary in her free time when she isn’t out and about with her ridiculous pit bull mix, Annabel Lee, or taking care of her goldfish, Carrot Cake. She is also putting her literature degree to use by working as an editor for a local online magazine, Independent Noise. While she has no plans for the future, she knows that it will be filled with fur and fiction galore. You can e-mail Jessica at managerjessica@yourpetspace.info

New Feathered Friends

As many of us begin a new school year this month, we will meet new people and create new friendships. Our companion animals may face the same thing. When coming into a new home or meeting another household member, companion birds may need some assistance from you to create these friendships and learn to live together in a happy household. There are some differences when your bird makes acquaintances with other birds, cats, dogs, and unfamiliar people. This information may help you guide your feathered companion to making fun and safe friendships.

Two cuddling bird buddies relaxing together.

Birds and Birds

Your first pet bird may seem a little lonely, so you may start wondering if it’s time to adopt a second feathered friend. To ensure a smooth transition with multiple birds, there are some steps that you will need to take. First of all, assess whether a second bird will be beneficial to your first pet. Ask your avian veterinarian for their opinion, and also consider your current bird’s personality.

Before bringing the new bird into the home, you will need to set up a quarantine area. Speak to your vet about how long this new bird should be separated, and know that the average quarantine time for a new bird is about 30 days. The reason for quarantine is to keep any illnesses from transferring to the first bird. Avian diseases are easily transmittable from bird to bird and they may not show symptoms until it is too severe. By keeping the new bird in quarantine, you will limit all interactions with your original bird. You will also need to be very strict on sanitation and cleaning so there is no chance of contamination to the first bird.

After quarantine, you may begin bird interactions. It is best to start slow and be very patient and to work at the speed of both birds. While the second bird is in quarantine, you can have a cage set up that this new bird will eventually go into a few feet away from the first bird’s cage. The first bird just needs to see the cage but not have any interactions with it. After quarantine, allow the second bird into its new, clean cage and give both birds time to adjust and get to know each other from a safe distance in their own space. When doing daily bird activities, it is best not to interrupt or change the first bird’s schedule. You can always introduce this schedule to the second bird. When preforming the daily actions such as feeding, cleaning, and training, always begin with the first bird. Treating the first bird as the “alpha” bird will make the addition less stressful for all.

Separate bird cages that are close enough for the two birds to see and communicate with each other but far enough apart so that they have their own space.

Once both birds seem more comfortable with each other, you can bring their cages slowly closer until they are also comfortable with that distance. Later, when they seem ready, you may add the second bird into the first bird’s cage. Give them space, but observe their behavior. They may want to stay separated from each other in this cage or they may begin to play. Let them act as birds do and figure themselves out with minimal intervention from you. If they begin to act distressed, they may not want to be housed together, but let the birds decide that for themselves. There may be some disagreements at first, but if the conflict continues without settling, it may be best for your birds to be caged separately. You will not want to be overly affectionate with one bird nor be too cuddly in front of the other. This may cause one of the birds to be overly protective of you and create jealousy between them. Give both birds equal quality time with you. This can also be done with them together. Allowing both of the birds their own space and time to become friendly with each other on their own terms may result in the best of flocked friends.

Two parrots sharing a cage, but spending some time in their own space calmly.

Birds and Cats

Believed to be enemies since Saturday morning cartoons, cats and birds can actually get along under the proper conditions. It would not be completely fair to any of your household companions to completely prevent access to a room that you frequent. That’s what happens if you prevent any pet from entering the bird’s room. As naturally curious creatures, cats want to explore and meet this feathered buddy that you are fascinated with. To be safe, it’s best to keep your bird in a heavy duty cage. You don’t want to have a cage that can be easily toppled over or one that can be torn apart. You need to feel comfortable for the safety of all your animals. Also, establish your bird’s cage in a corner or against a wall so, if the bird becomes uncomfortable, it can retreat to that safe area of the cage. Spend some time with both animals in the room. Keep the bird in the cage for now and just let your cat explore and smell the bird’s area. If the cat tries to bat through the cage with a paw, give them a command like “No,” or “Stop” to cease their action. You need to train your cat that it is not okay to swat at the bird. If your bird receives a bite or scratch, it can become very ill very quickly.

Once your bird becomes more comfortable with the presence of the cat, you can then start to take the bird out of it’s cage. A good way to do a face-to-face meeting between the two is to hold the bird on your hand or finger and allow the cat to approach. This way, if the animals start to get uncomfortable or too excited, you can lift the bird up and return it to it’s cage. Do not allow the cat to lick or bat at the bird at all. It may seem innocent and playful, but accidents can happen so it’s best to prevent this behavior early. Reward your cat with treats for either ignoring the bird or for gentle and calm actions. Reward your bird similarly with some of it’s favorite treats as well. With calm and repetitive actions, your cat and bird should get along fine.

A budgie gently preening a kitten.

Birds and Dogs

When introducing your dog to the bird, you want follow similar steps as the cat introduction. A sturdy cage and keeping your demeanor calm will make this process easy. Just the same as the cat, you want to supervise the dog’s presence around the bird while the bird is still secure in its cage. Give similar serious commands if the dog becomes too excited or tries to jump on the cage. These actions can be very threatening to a flighty bird. Once everyone seems comfortable, you can progress to holding the bird and allowing the dog to smell and meet the bird. Give the dog the same strict commands if it attempts to lick the bird or if they become a little too forceful in their curiosity. Birds may be seriously hurt from a dog bite or from being jumped upon. Reward calm and sweet behavior for both animals to reinforce proper conduct. Eventually, all animals should be able to interact safely together. It is recommended that you always supervise when your animals interact with each other for everyone’s safety.

This Golden Retriever likes to keep his feathered friends nearby.

Birds and People

Introducing birds to another person who will be living in the same household can also be complicated, but it is very similar to the process utilized with cats and dogs. Some birds, especially larger parrots, tend to bond with one person. Giving birds opportunities to make more human friends will provide greater entertainment for both species. Children, of course, will need to be closely supervised when interacting with the bird. With older people, it depends mostly on your bird’s behavior. The best way for anyone to get to know your bird is to just have them spend some time in the same space as the bird. Having the new person hang out near the bird’s cage while reading or watching television is a great way for the bird to start getting familiar with them.

Once the person and the bird are more comfortable together, you can progress to having them hold the bird. Start by having the new person hold their arm straight out horizontally and have the bird stand on their arm. This is a safe way for the bird to decide how close they want to get to this new person. In addition, the person is less likely to exhibit quick, jerky movements while attempting to pet the bird. Once the person is more comfortable and understands the bird’s behavior better, they can start to hold the bird on their hands or fingers and form a closer bond. The new person should also offer some yummy treats when the bird behaves nicely.

Child and bird sharing a healthy snack together.

Patience and rewards for good behavior are an excellent way to assist your birds to become friends with many species. New friendships enrich the bird’s life by mimicking a flock mentality. It also promotes greater intelligence, and having someone new to play with is always a good thing. These new friendships should last for many years to come!

Ashley Gurnea, our Avian Editor, is a certified bird feeding specialist at Wild Birds Unlimited. A graduate from New Mexico State University, Ashley earned her bachelor degree in the field of Animal Science. She completed an internship at an exotic animal park, working with animals ranging from camels to porcupines and a variety of birds such as parrots and cockatoos. This love and curiosity of aviary has led her to her current position at Wild Birds Unlimited in Las Cruces where she remains up to date with local wild feeder birds. Growing up in a home where animals have always been present, Ashley is now a self-proclaimed “Corgi Countess” due to her love and adoration for her tricolor Pembroke welsh corgi, Colin.  Bring up anything corgi or bird related in a conversation and Ashley will be happy to share her many photos. Feel free to ask her about pet birds, and visit Wild Birds Unlimited for questions on wild birds! Ashley can be reached at ashleygurnea@gmail.com.

On the Road Again: Making Travel Time Fun and Safe

Traveling with K2 the Wonder Dog

Welcome to adventures on the road with K2 the Wonder Dog! K2 is my 2 ½ year old yellow Labrador Retriever. He is my second lab, named after the first one, Kojak. His full name is Kojak Version 2.0 (K2 for short). I call him the ”wonder dog” because I always wonder what he is thinking!  My husband and I have been RV-ing and traveling with dogs for quite a few years. I hope K2’s adventures will help you learn to enjoy traveling with your dog as well.

Many of us leave our dogs in the loving care of Your Pet Space when we travel. I know K2 loves to be there and play with his doggy pals! But there are times when it makes more sense to take him with us. We travel both by car and by RV for vacations and to visit relatives, and have some helpful tips for those of you looking to travel with your dog.

Traveling with a dog is a little bit like traveling with children: you need to be prepared for a lot of different things, but if you think it through ahead of time, it can be very enjoyable and rewarding.

Dog Travel Packing List

One of the first things to do is to make a list of the things you will need for the dog, much like you make a packing list for yourself. Here is the list I use:

Vaccination records, towel, current photo, pet bed and blankets, water, cleaning supplies, food, poop bags, treats, toys, bowls, medication, collar and leash, first aid kit.

The current photo of your pet in the list of items to bring is in case something happens and he gets loose or lost – hopefully it will help you find him. It hasn’t happened to me yet, but I’d hate to not be prepared – I don’t want to lose my buddy.

You might think: what do I need cleaning supplies and a towel for? Well, if you stop by a beach, and your dog drinks the salt water, you’ll need to clean him up before getting back in the car, and if you don’t wait long enough for him to purge himself of the salt water he drank, you’ll have a mess in the car to clean up as well. This has happened to us – K2 emptied himself of almost a gallon of water in his kennel in the car – luckily I had my towel to mop it up and cleaning supplies to make it all shiny and smell good. Also, you never know when your dog will find mud to play in at a dog park either. K2 was filthy after digging in the mud one day.

Car Safety Dos and Don’ts

Lets go over safety next: always make sure your pet feels (and is) safe and secure when in a vehicle.

Some people like to let their dogs roam free in the car, envisioning them standing by the window, head in the wind, ears flapping in the breeze and tongue hanging out with a grin. Most dogs love this, and when they aren’t hanging out the window they will often curl up on the floor or a seat and nap while you drive. While this seems easy and stress free for you and your dog, it is NOT SAFE if you have an accident, or even if you brake quickly. If your dog is roaming free in the car, they can easily open an automatic window and leap out while the vehicle is moving, not to mention the distraction they can cause you by barking and moving around the car. We’ve all seen the crash test dummies go through windshields when they don’t wear a seat belt – think about what this will do to your beloved companion! One final, big No-No: doggies should not ride in your lap! In many states (including New Mexico) it is illegal, and it is also dangerous for both you and your pet. Keep safety in mind when deciding how to transport your beloved companion.

Some people use harnesses, others prefer crates. Do some research online and find a solution that works for you. PetAutoSafetyBlog.com is a great reference. If your dog is already crate trained, a crate in your car is ideal. The crate is great because it can also be used in the hotel room at night. Small creates that are secured by a seat belt are available for smaller dogs. Crates and seat belt harnesses should be in the backseat – just like child safety seats. This is the safest place for your dog to be in the car in case of an accident.

Some dogs travel well, others take a bit more time to get used to it. If the only time your dog is in the car is to visit the vet, they may feel anxious or nervous about a car ride. Make the environment as familiar and comfortable as possible for your pet. Get your dog used to sitting next to you in the car (without driving). Feed them a few meals a week in the car. Take some test trips before a big trip: outings for walks, to visit friends, and going to dog parks should make your dog more comfortable while traveling in your car. Make sure your dog is wearing a collar with an identification tag and a rabies tag attached. Micro-chipping your dog is also highly recommended (and actually REQUIRED in New Mexico), and it will help you recover your pet if they get lost. If your dog has anxiety about traveling, talk to your vet about possible medications that can help. Another thing to try would be a Thundershirt anxiety jacket.

While on the road, you need to stop frequently to allow your dog time to stretch his legs and relieve himself. Aim at stopping every 2-3 hours. Look at the route you plan to take ahead of time, and look for places along the way to stop. Your dog, especially if they are not as used to traveling, may need to go more frequently than they do at home because of the stress of the car ride. K2 loves it when we stop at a dog park – it also ensures that when we get back in the car, he will sleep for the next couple of hours.

The best dog park we stopped at while traveling was a beach front dog park along the gulf coast. K2 not only got to romp and play with other dogs, he got to go swimming in the ocean. The fence for the dog park reached out into the ocean far enough I didn’t worry about him swimming around the fence. K2 is your typical lab when it comes to water – I always say if he had a bumper sticker, it would read “I’d rather be swimming”. I would never have stopped at or found this park without having spent some time looking before I left home and planning the stop as part of the trip – remember to plan ahead and you may find some really wonderful places.

Debbie and K2 on a pier.

DON’T LEAVE YOUR DOG ALONE IN YOUR CAR!!!!

Should you leave your dog unattended in your car? The easy answer is a resounding NO. Many states have laws against leaving your dog alone in your car – especially when it is hot. Even if the temperature outside is pleasant, a car still heats up in the sun.

But what if you want to eat dinner, or go somewhere your dog can’t join you? Planning ahead is key. If you know that you’re going to be spending the day at an amusement park or eating dinner out, check the area you will be in BEFORE you leave home and contact a doggy day care and arrange to drop your dog off. Another choice, if you are just passing through and want to get a bite to eat or go shopping, is the “tag team”, method, where one of us will go in while one of us stays with the dog, then the other person goes in when the first person is done. For a meal, once the first person has decided what they want to order, they return to the car and let the other person go in until the dinner is served. Once they are done eating, they switch with the other person. Another easy method is to order the food to go, and eat back at the hotel – or even better, at a park where you can walk your dog. If you are traveling alone, I recommend pick up or delivery for meals, and to eat in your hotel room. Having a cooler in the car filled with drinks and food can be useful as well – and for me, it tends to help me eat healthy food instead of junk food – an added bonus!

Traveling with K2 in the RV

Having the RV makes it easier to leave the dog while we go shopping, visit tourist attractions, or head out to eat. We can turn the generator on and leave it running to power the air conditioner if it’s hot, or the heater if it’s cold. But even when we do this, we return to the RV to check on K2 every 20 minutes or so, just in case something goes wrong and the generator fails. If we are at an RV park, I can rest assured that he will be okay until I return, since we are hooked into power and the RV can now be considered equivalent to leaving the dog at home when you go out. Expect more details on RV traveling with your pets in a future installment!

In conclusion, it can be a lot of fun to travel with your dog, but it does take some forethought and planning. Join me for K2’s next set of adventures, when we talk about how to find things to do and places to stay with your dog while on vacation or visiting friends and relatives, and how to keep him from annoying other hotel guests.

Until next time – get on the road and enjoy some time with your dog!

Deborah Ivey is a Las Cruces transplant. She describes herself as a high-tech gypsy, having moved frequently throughout her life wherever her work takes her. Now retired, she travels with her husband, Jim, and their dog K2, both by car and in their RV. She loves to explore new places, and find fun activities for herself and her dog to enjoy together.

War Horse – A Touching Story In All Its Incarnations

The Animals In War memorial in London.

This is the time of year when we look back at The Great War, which began on the 28th of July in 1914. The War to End all Wars was one of the largest wars in history, and it brings sharp images to mind about soldiers fighting in trenches, loss of life, and suffering. Most of these stories are about men being sent off into battle for their countries, but one of the more popular tales shifts away from that traditional format and instead shows us the War through the eyes of a fictional horse named Joey. There are three versions of this story: a book, a play, and a movie, and since all three are adored by their fans, I thought that, for this anniversary, I would give a little history on how Joey, Topthorn, and all of the characters became as much a part of our lives as so many other famous tellings of this moment in history.

The Book

Cover of War Horse, by Michael Morpurgo

The first incarnation of War Horse came about through a number of routes. Author Michael Morpurgo met three veterans of the Great War who had told him their stories. Wilfred Ellis of the Devon Yeomanry, Captain Budgett of the cavalry, and a villager named Albert Weeks all told of their interactions with horses in one form or another, either because they had served with them, or because they could remember when the army would enter local areas to purchase any horses they could find. Hearing these stories made Morburgo think seriously about showing the Great War through the eyes of a new character, a horse.

In an interview on BBC Radio 4, Morburgo explained his second motivation for writing the book came from a child who refused to speak because of a stammer. The boy was at a farm as a part of the Farms for City Children program, which Morpurgo and his wife had founded, and he was lost in conversation with a mare. The mare was intently listening to every word, and the two seemed to have bonded in this moment. The boy had found bravery, and the mare had found a purpose in being there for the boy in his moment of need.

The final inspiration for War Horse was an actual painting by F. W. Reed of horses trapped in barbed wire as they charged into battle. The painting was fictionalized for the book as a picture of Joey “Painted by Captain James Nicholls, autumn, 1914.”

Closeup of the face of Joey from the National Theatre production of War Horse

I have to say that my own personal experience with reading War Horse has revealed all of these inspirational moments in the author’s life. Each of these examples is so perfectly included in Joey’s story that simply writing them down here brings to mind specific parts of the horse’s fictional life or the troubles and emotions of his owner, Albert. When it comes to other versions of War Horse, some are even more clear than others, such as the painting coming to life in the play as Joey struggles against barbed wire in his attempts to escape an oncoming tank.

The Play

Opening in London in 2007, the play was instantly recognizable by the use of life-sized puppets made by the Handspring Puppet Company. Controlled by three puppeteers, Joey and Topthorn steal the show for so many who attend. Videos of Joey interacting with real horses can be found all over the internet and his live appearances outside of the theater still draw over-sized crowds.

Joey reacting to the sound of emergency vehicles while performing at West End Live in London. The crowd was awed by the puppeteers’ ability to recreate a natural reaction.

Saying that the puppeteering is amazing is only expressing my opinion, of course. I have seen the play live several times, as well as been to the National Theatre live filmed version which plays in movie theaters on occasion. I am constantly amazed at how quickly I accept Joey and Topthorn as real horses, even with the puppeteers clearly visible. The play has a slightly darker feel, both visually and emotionally, than the book or the movie, perhaps because you are watching history come to life in front of you, or because of the staging. Whatever the reason, I am always left with the thought that we have experienced the play more through the horses’ eyes, even more-so than how we read it in the book or watch it in the movie.

The Movie

Fans of War Horse were given a holiday gift in 2011, when the movie adaptation was released in December of that year. This version has always felt more balanced when it comes to light and dark content, and it contains elements from the play (like the goose) that will have theater goers looking back at their memories of the live experience with great fondness.

There is more of an equilibrium between human and animal perspective as well, making the movie more of a story told by everyone, rather than something seen only through the eyes of a horse. Occasionally, a scene will push more toward what you would expect from Joey after having read the book, but most are just horse and human interaction, bringing to mind the story of the boy and the mare from the farm. The horses in this film are as much actors as the humans are, and the cinematography is simply stunning.

Movie poster, advertising the cinematic version of War Horse.

Why We All Need Joey

I have to say that of all of the stories that have been translated from book to play to movie, War Horse has always felt the most consistent throughout all of its incarnations, and it is a story that I have never grown tired of. Though my heart is really for Topthorn, I still feel a swell of amazement and love for Joey whenever I see his interactions on the streets. No matter how fresh some scenes are in my mind, it always touches my heart to see or read them again. War Horse is something that reminds us that hope can always be found in hard times and that humans weren’t the only ones who suffered in the War. So for this upcoming anniversary, seek out your favorite version of War Horse and remind yourself that not all soldiers from the Great War walked on two legs.

Mirrani Houpe, our Small Animal Editor, has had rats since she took home her first little boy once they both completed the second grade. Since that time she has owned, rescued and bred many kinds of rats, from many backgrounds. She may not be a vet, psychology major, or scientist, but her babies have her very well trained when it comes to how to care for them. She is constantly working with her family’s veterinarian to come up with new and innovative ways to love and care for the most often misunderstood rodent in the pet world. You can e-mail her at mirrani@yourpetspace.info

Cat Poo 101

As the first installment of our “Back to School” series, welcome to Cat Poo 101! The basics of what YOU need to know about your cat’s poop!

This article will cover the importance of regularly keeping an eye on your cat’s poop, signs to watch out for in their poop, why it’s important to frequently scoop out your cat’s litter box, how poop can impact your health, and the problem with parasites. Caution: If you find yourself sensitive to the topics of poop or photos of poop, you are not required to read this article.

These little babies are interested in the topic at hand! They’re even practicing good litter box manners.

It’s important to habitually keep an eye on your cat’s poop since you can learn a lot about your cat’s health from it. Cats will usually use their litter box once to twice a day; normal, healthy poop will not feel too lax and not too firm, have a deep brown color, and will have some amount of odor but not smell too foul. If you see this type of poop your cat’s litter box, you have nothing to worry about. However, if your cat is having constipation or diarrhea in the litter box, it’s imperative to keep watch on it and know how often it happens.

If your cat is experiencing constipation, they will strain and push themselves when they try to poop, or they may not be able to poop at all. If constipation is common for your cat, here are a couple of reasons why they may be struggling:

  • Kidney problems
  • Feline mega-colon (this is when your cat’s colon gets very large and the muscles can no longer squeeze, resulting in the poop becoming hard and built up inside)
  • Lack of fiber in their diet
  • Possible spine pains or problems
  • Over-grooming (this can lead to extra hair being in their digestive tract)
  • Colon blockage
  • Problems inside their colon like narrow spaces or tumors

This guy looks like he might be struggling a bit.

To ease your cat’s constipation, you can provide more fiber in your cat’s diet by adding:

  • Canned pumpkin
  • Powdered fiber supplements
  • Cooked mashed carrots
  • Mashed peas
  • Strained prunes
  • Water
  • Coconut oil
  • Wellness CORE Grain-Free Original Dry Formula
  • Blue Buffalo Wilderness Indoor Hairball Control Chicken Recipe
  • Merrick Limited Ingredient Diet Grain-Free Duck Recipe
  • Nature’s Variety Instinct Limited Ingredient Diet Rabbit Formula

Regardless of what you try to do to add fiber to your cat’s diet, make sure to take your cat to your veterinarian.

It is not uncommon for cats to have diarrhea. Sometimes it comes and goes, but if it lasts for months, weeks, or even days, or even if it comes and goes on a regular basis, your cat could be suffering from:

  • Inflammatory Bowel Disease
  • Hyperthyroidism
  • Pancreatic Disease
  • Changes to their food or diet that result in intolerance or allergies
  • Colitis
  • Intentional parasites (worms)
  • Cancer

This pretty kitty seems to be avoiding her litter box.

If your cat has diarrhea for longer than forty-eight hours, take your cat to the veterinarian to have them diagnose the cause. If your cat’s diarrhea appears bloody or black, or if your cat has also been vomiting, been lethargic, has a fever, or a loss of appetite, take your cat to an emergency veterinarian right away. Your veterinarian might prescribe medications such as prednisolone or metronidazole to help with inflammation. To prevent diarrhea, do not give dairy products to your cats because they do not digest them well.

Setting up a litter box is pretty easy; get a plastic cat box from your local pet store or Walmart, purchase the cat litter of your choice, and fill the box. It’s vital to keep in mind that cats are very clean animals; they spend sixty percent of their lives grooming themselves! Some cat owners have very different definitions and standards of what a clean litter box is. Preferably, you should scoop out your cat’s litter box twice a day, once is also good. Some cat owners will only clean out their cat’s litter boxes once a week, and even others will clean out the litter box once every two weeks. Would you want to step over mounds of urine clumps or dried up poop to use the restroom? No, of course not! Neither would your cat. Sometimes cats will hold in their poop so they won’t have to “go” in a dirty litter box. So, unless you want a constipated cat, get in there with the pooper-scooper and clean the cat box.

Let’s talk about the health problems a dirty litter box poses to your cat and how it affects your health. Since your cat is the one who uses the litter box, they will suffer first. Your cat can suffer from constipation and urinary tract infections from holding it in from not wanting to “go” in a dirty litter box. Both you and your cat can suffer from bacterial infections (otherwise known as cat-scratch fever) and Salmonellosis. The infection can spread from your cat (who may be using a dirty cat box) to you if you cuddle with your cat. You, however, will suffer from a few diseases if you do not clean your cat box regularly. These problems can include parasite transfer. Cat poop is also home to a horde of parasites (ringworms, hookworms, and roundworms) as it sits and dries in the cat box. One of those parasites is called Toxoplasma gondii; it’s a single-cell parasite which produces fever-like symptoms and has been connected to increased suicidal tendencies. You can also have an overexposure to ammonia as the poop and urine accumulate in the dirty litter box, since they both produce ammonia fumes. Ammonia is a toxic gas; when it is mild, it can cause headaches and queasiness. When there are large amounts of ammonia, it can result in respiratory issues such as pneumonia.

“Excuse me, did you clean my litter box today?”

Now let’s go over our parasitophobia because these little critters can be harmful to our cats if litter boxes aren’t scooped out regularly. Parasites are a huge issue when it comes to cat poop. Whether your cat already has parasites or they are simply reproducing on the poop, it is possible for them to transfer them from cat-to-cat and from cat-to-human (especially if you have children). Roundworms are one of the most common intestinal parasites of cats. The adult female worm produces fertile eggs that are passed in the infected cat’s feces; the eggs need several days to several weeks to develop in the larvae stage. Affected cats may have diarrhea, vomiting, constipation, or loss of appetite. Less common than roundworms, hookworms are infectious parasites, as well. They’re so small that they are not visible in the cat poop, but they are able to live as long as your cat. Adult cats can become infected by the larvae that penetrate their skin or if they become ingested. Mild cases of hookworm can cause diarrhea and weight loss, but if it is severe, it can cause anemia due to blood loss from the intestines where the worms attach themselves. Your cat’s poop will look similar to black tar because of digested blood in your cat’s poop.

CLEAN OUT YOUR LITTER BOX!!!

I hope you enjoyed this information or at least found Cat Poo 101 interesting! Before you click the ‘X’ button at the top of your browser, remember these three tips:

  • Keep an eye on your cat’s poop
  • Take your cat to the veterinarian if your cat’s poop is irregular
  • Scoop out your cat’s litter box at least once a day!

Elanda-Isabella Atencio, our Feline Editor, is on her road to being a “crazy” cat lady. She has three cats; a moody Missus, a wild Baby Kitty, and notorious Fredrick Douglass. She was raised with cats, chickens, dogs, and geese. From cleaning coops, morning dog runs, picking eggs, to growing catnip, Elanda enjoys pampering her pets. Elanda is a student at New Mexico State University, earning her BA in Creative Writing and is Editor-in-Chief of the online arts journal, Independent Noise and reader for Puerto del Sol. She plans to move to Oregon, where she hopes to take her cats on daily walks when it’s overcast and cool. If you’d like to contact Elanda, email her at eincatencio@gmail.com.

The Essential Guide To Buying Your First Horse

Owning a horse or pony is the ultimate dream of many horse lovers, and it can be an incredibly rewarding and exciting experience. However, finding the right horse can be a daunting experience for first-time buyers. Here, we guide you step by step on everything you need to know about buying your first horse.

Finding your best friend can be a difficult task.

Before You Buy

Owning a horse is a long-term commitment, both financially and time-wise, so consider carefully beforehand by asking yourself the following questions:

  • Are you ready for the responsibility of owning a horse?
  • Do you have the finances, time, and knowledge to look after one properly?
  • Where will you keep it?

Prepare yourself by:

  • Having regular riding lessons with a qualified and experienced instructor on school horses.
  • Learn all you can about horse care. Inquire at your local equestrian center about stable management courses, and ask to volunteer in the barn to gain more experience.
  • Leasing a horse, either full or partial, for at least six months, gives you a good idea of what owning is like and whether you can devote the necessary time required.

As well as the initial purchase, you need to budget monthly for various expenses such as:

  • Boarding fees
  • Hay
  • Feed
  • Bedding
  • Shoeing
  • Worming
  • Veterinary costs

Other possible extras include riding lessons, plus the services of an equine dentist, saddle fitter, chiropractor, or similar services when required.

You’ll need lots of practice before you’re ready to own a horse!

There is also tack, rugs, and other equipment to buy, plus entry fees and transportation costs should you wish to compete. The list is endless and will put a strain on your finances for many years if you are not prepared!

Boarding

If you are still keen to buy a horse, the next step is deciding where to keep him. Most horse owners opt for a boarding facility at a barn. Ideally, this should be no more than a 30-minute drive from your home. Costs vary depending on location and services:

  • Full care – included in the service is feeding, hay, bedding, cleaning of the stall, and turn out. Ideal if you can afford it and don’t have much time to care for a horse due to work, family, etc. If you require exercising or training as well, this will cost extra.
  • Self-care – your horse is given a stable and possibly turn out, too. You must provide hay, bedding, and feed and take care of all your horse’s needs yourself. This service is a cheaper option, but you need to have the time and commitment. Often, other owners will help each other out when necessary, so it is a good idea to get to know them.

Ensure that your horse is well taken care of at all times.

You also need to consider if the facilities are suitable for what you want to do with your horse. If you want to compete, is there an arena with jumps available and are you allowed an outside instructor? If your interest is trail riding, are there plenty of places to ride?

Visit barns before you start looking for a horse to make sure there are vacancies. Tell the proprietor if you are interested so you can reserve a stall.

What Type of Horse Should You Buy?

When deciding on what kind of horse you should buy, your safety must take top priority, so be realistic about your abilities. Take your time looking for a horse. It is a huge investment so you want a horse that you can enjoy and make progress with for many years.

Some of the top things to consider are:

  • What is your budget?
  • Is the horse just for you or other members of the family?
  • Do you want a schoolmaster that can teach you and help you improve? Don’t be put off by older horses. They know their job and, with proper care, can go on for many years.
  • If buying a youngster or green horse, do you have the knowledge and experience to bring it on? Don’t believe that you can learn together as this is very dangerous.
  • You want a horse you will feel comfortable on, so what size should you get? Avoid too big and too small.
  • What type of work will you require the horse to do?
  • Mare or gelding? Geldings are typically easier to handle. Mares can be challenging and temperamental, especially when they are in season. However, it depends on the individual horse, so don’t necessarily be put off by a mare.

Sometimes older horses are the most reliable!

How to Find a Suitable Horse

So, how do you find the right horse for you?

First, ask an experienced person, such as your riding instructor or a knowledgeable friend, if they know of any suitable horses for sale. Otherwise, search for adverts in local and national equestrian magazines and on equine websites that have horses for sale.

The most important point to consider when buying a horse is a good temperament. Look for terms such as “bombproof,” “steady and reliable,” “easy to do,” “snaffle mouth” and “quiet.”

Avoid terms like “needs experienced or strong rider,” “green,” “very forward going,” and “has potential.” These are clear indicators that the horse needs training or is difficult to ride. The advert should also state that the horse is good to catch, lunge, shoe, clip and trailer with no vices. Make a note of any omissions so you can ask the owner.

Questions to Ask the Owner Before Viewing a Horse

Once you have found certain horses that you consider suitable, contact the owners to learn more. Discover as much as you can so you can tell if the seller is genuine or not, and whether the horse sounds right for you. That way you can avoid a wasted journey.

Questions to include are:

  • Does the horse have a good temperament?
  • Is he good to handle?
  • Is he good to catch, tack up, clip, shoe, trailer, lunge?
  • What is his experience?
  • How long has the current owner had him?
  • Why is he being sold?
  • Is he good to ride out both alone and in the company of other horses?
  • Is he good in traffic?
  • Does he have any vices?
  • Has he ever reared, bucked, or bolted?
  • Is he spooky?
  • What kind of bit is used when riding?
  • Is he ridden with any training aids and why?
  • Does he have a competition record?
  • How is his behavior at shows?
  • What is he like with other horses?
  • Does he require any special shoeing?
  • What is he fed/does he need supplements?
  • How often is he currently ridden? Must he be ridden every day?
  • Has he had any lameness or illness?
  • Has he ever had colic?
  • Are his vaccinations, worming, and teeth floating up-to-date?
  • Does he have a passport?

Also, ask the owner if they have any videos of the horse that you can watch before attending a viewing.

If you want a horse for jumping, make sure they can jump!

Viewing Horses for Sale

Once you have decided that a horse is worth trying, arrange to go and see it with an experienced person, like your riding instructor. When trying out horses, trust your instincts. You want to feel happy and safe with any horse you intend to buy.

On the day of the viewing:

  • Before you arrive, ask to see the horse caught in the paddock. Is he easy to catch?
  • Look at his confirmation.
  • Check his legs for signs of injuries.
  • Watch him trot-up in hand so you can assess his movement.
  • Ask to brush and tack him up yourself in the stable. Does he stand quietly and have good manners?
  • Look around the horse’s stall for any signs of stable vices such as a chewed door.
  • Have the owner ride him first. Watch him ridden in walk, trot and canter, and then over a few jumps if you want the horse for jumping.
  • If you are happy with what you see, ask your expert to ride him, then try the horse yourself, being videoed if possible.
  • If you are comfortable riding the horse in an arena, ask to ride him outside.
  • It is a good sign if the owner is asking you many questions as well. It shows they are genuine and want their horse to go to the right home.
  • Listen to your expert’s opinion and whether they think the horse is suitable.
  • It is recommended, if you like the horse, to return for a second viewing. Ask to see him lunged and loaded into a trailer as well as riding him again.

Deciding to Buy

Once you have found the right horse for you, it is vital that you arrange a pre-purchase vetting with a veterinarian who has never treated the animal. You and your expert should be present, along with the owner, who will know the horse’s health history. Discuss thoroughly with the veterinarian as to what you want to do with the horse. That way they can see if the horse is fit for the purpose you want it for and make sure they are in good health.

The veterinarian will give a basic health and lameness assessment, neither passing or failing the horse outright, but sharing their observations with you. They may suggest further tests and x-rays.

Before making the final decision to buy, it is a good idea to ask the seller if you can have the horse on trial for a week or two. The trial may take place in the owner’s barn or where you intend to keep the horse.

If the seller is happy to do this, they will probably want a written agreement and request you provide insurance for the horse. They are most likely to ask for a deposit or other payment as security.

Soon you’ll be riding off into the sunset with your new best friend.

Once you have decided that the horse is right for you, you can negotiate a price with the seller. Ask if this price includes any tack and rugs. You should then have an equine purchase agreement drawn up with details of the horse as described in the seller’s advert. Speak to a lawyer to ensure that it is legally binding.

Final Thoughts

Make sure you gain as much knowledge and experience as possible before you buy a horse and find a suitable place for boarding. Take your time, trust your instincts, and always take somebody experienced with you.

There may be wasted journeys and disappointments, but you will eventually find your perfect horse, and you will undoubtedly enjoy many happy years together!

Alison O’Callaghan, our Equine Editor, is a professional horse riding instructor and has owned many types of pets. When she is not riding horses or walking her dog, she loves to write about animals. If you’d like to contact Alison, you can email her at ocallaghan462@gmail.com.